MQTT is a lightweight messaging protocol suitable for embedded and IOT devices.
Websockets ( RFC6455 – https://tools.ietf.org/html/rfc6455 ) is socket programming for internet, an evolution of browser / web server HTTP enabling real-time bidirectional data exchange and binary messaging.
How do we interface a MQTT enabled IOT sensor device with a web browser interface displaying a real time graph chart?

Introduction to WebSockets – Real Time TCP Sockets for Internet
With modern browser engines and responsive web UI technologies built on HTML5, SVG and JavaScript frameworks, sophisticated visualisation, display and dashboard reporting capabilities have emerged.
Responsive Web UI runs in any browser installed device – laptop, dekstop, tablet or mobile, without need to install additional software or prepare application code for specific device architectures.
HTTP browser clients essentially implement a polling request/response technique for retrieving and updating HTML format webpages.
Due to need to establish a connection for each new request, HTTP is not well suited to real time or high volume messaging, charting or visualisation applications.
Although AJAX (asynchronous JavaScipt XML) and REST, SOAP API programming overcome this to a certain extent these methods are relatively inefficient for some use cases due to protocol overhead.

With Websockets, TCP network socket programming becomes possible in a browser client application.
Clients can establish a network socket connection, this channel remains open and two-way data exchange including binary messaging formats takes place.
Sockets are well established in UNIX and Windows OS client/server programming, but are relatively new to the web.
Arduino ESP32 Barometer Sensor MQTT Device

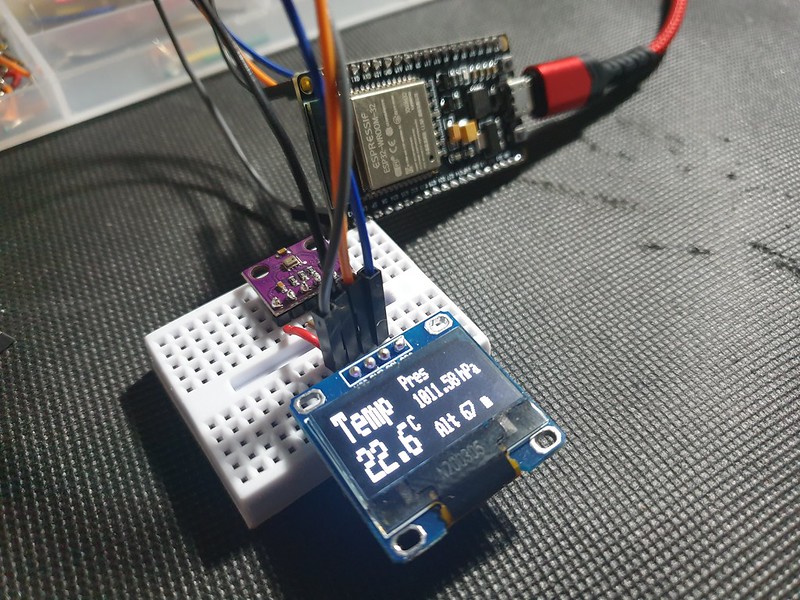
An environmental sensor based on an Expressif ESP32 micro-controller and BMP280 Bosch sensor reads air pressure, temperature and altitude –
#include <Adafruit_BMP280.h>

Adafruit_BMP280 bmp;

void setup() {

  if (!bmp.begin()) {
    Serial.println(F("Could not find a valid BMP280 sensor, check wiring!"));
    while (1);
  }

  /* Default settings from datasheet. */
  bmp.setSampling(Adafruit_BMP280::MODE_NORMAL,     /* Operating Mode. */
                  Adafruit_BMP280::SAMPLING_X2,     /* Temp. oversampling */
                  Adafruit_BMP280::SAMPLING_X16,    /* Pressure oversampling */
                  Adafruit_BMP280::FILTER_X16,      /* Filtering. */
                  Adafruit_BMP280::STANDBY_MS_500); /* Standby time. */

}

void loop() {

  Serial.print(F("Temperature = "));
  Serial.print(bmp.readTemperature());
  Serial.println(" *C");

  Serial.print(F("Pressure = "));
  Serial.print(bmp.readPressure()/100); //displaying the Pressure in hPa, you can change the unit
  Serial.println(" hPa");

  Serial.print(F("Approx altitude = "));
  Serial.print(bmp.readAltitude(1019.66)); //The "1019.66" is the pressure(hPa) at sea level in day in your region
  Serial.println(" m");                    //If you don't know it, modify it until you get your current altitude

  display.clearDisplay();
  float t = bmp.readTemperature();           //Read temperature in C
  float p = bmp.readPressure()/100;         //Read Pressure in Pa and conversion to hPa
  float a = bmp.readAltitude(1019.66);      //Calculating the Altitude, the "1019.66" is the pressure in (hPa) at sea level at day in your region

  delay(2000);
}
Data is communicated over Wifi to an MQTT messaging server.
On Arduino we can use PubSub MQTT Library ( https://github.com/knolleary/pubsubclient ).
To set this up, first we define Wifi and MQTT server credentials and topic id (channels) and define a transmit data buffer:
const char* ssid = "__SSID__";
const char* pass = "__PASS__";

IPAddress mqtt_server(192, 168, 1, 127); // local LAN Address
const char* mqtt_user = "mqtt";
const char* mqtt_password = "__mqttpassword__";

const char* mqtt_channel_pub = "esp32.out";
const char* mqtt_channel_sub = "esp32.in";

WiFiClient wifi;
PubSubClient mqtt(wifi);

#define MSG_BUFFER_SIZE (128)
char msg[MSG_BUFFER_SIZE];
Then we setup Wifi connection:
  WiFi.begin(ssid, password);

  while (WiFi.status() != WL_CONNECTED) {
    delay(500);
    Serial.print(".");
  }

  Serial.println("");
  Serial.println("WiFi connected");
  Serial.print("Connecting to ");
  Serial.println(ssid);
  Serial.println("IP address: ");
  Serial.println(WiFi.localIP());
And attempt to connect to MQTT broker, sending a hello message:
void loop() {

  while (!mqtt.connected()) {
    Serial.print("Attempting MQTT connection...");
    // Create a random client ID
    String clientId = "ESP8266Client-";
    clientId += String(random(0xffff), HEX);
    // Attempt to connect
    if (mqtt.connect(clientId.c_str(), mqtt_user, mqtt_password)) {
      Serial.println("connected");
      // Once connected, publish an announcement...
      mqtt.publish(mqtt_channel_pub, "hello ESP32");
      // ... and resubscribe
      mqtt.subscribe(mqtt_channel_sub);
    } else {
      Serial.print("failed, rc=");
      Serial.print(mqtt.state());
      Serial.println(" try again in 5 seconds");
      // Wait 5 seconds before retrying
      delay(5000);
    }
  }

  mqtt.loop();
}
After reading, we can transmit sensor values (Temperature T, Pressure P, Altitude A) on ESP32:
  snprintf(msg, MSG_BUFFER_SIZE, "%.2f,%.2f,%.2f", t, p, a);

  Serial.print("Publish message: ");
  Serial.println(msg);
  mqtt.publish(mqtt_channel_pub, msg);
MQTT to WebSocket RFC6455 – Node.JS Relay

On server we require a relay to subscribe for MQTT messages on sensor device channel, establish a WebSocket and write data to connected browser clients.
An implementation in NodeJS requires WS, MQTT and events libraries:
// setup Websocket Server
const WebSocket = require('ws');
var ws_host = "192.168.1.127";
var ws_port = "8080";
const wss = new WebSocket.Server({ host: ws_host, port: ws_port });
var ws = null;

// Setup MQTT Client
// mqtt[s]://[username][:password]@host.domain[:port]
var mqtt = require('mqtt'), url = require('url');
var mqtt_url = url.parse(process.env.MQTT_URL || 'mqtt://192.168.1.127:1883');
var auth = (mqtt_url.auth || ':').split(':');
var url = "mqtt://" + mqtt_url.host;
var mqtt_channel_in = "esp8266.in";
var mqtt_channel_out = "esp8266.out";

var options = {
    port: mqtt_url.port,
    clientId: 'mqttjs_' + Math.random().toString(16).substr(2, 8),
    username: 'mqtt',
    password: '__mqtt_password__',
    keepalive: 60,
    reconnectPeriod: 1000,
    protocolId: 'MQIsdp',
    protocolVersion: 3,
    clean: true,
    encoding: 'utf8'
};
NodeJS is event based, when an MQTT message is received it can be forwarded to all connected WebSocket clients:
mqttClient.on('message', function sendMsg(topic, message, packet) {

  console.log(topic + ": " + message);

  var eventListeners = require('events').EventEmitter.listenerCount(mqttClient,'message');
  console.log(eventListeners + " Listner(s) listening to mqttClient message event");
  console.log(mqttClient.rawListeners('message'));

  wss.clients.forEach(function each(ws) {
    if (ws.isAlive === false) return ws.terminate();
    console.log(data);
    ws.send(data+" ");
  });

});
MQTT allows many subscribers to receive topic messages.
Python Eclipse Paho MQTT client with Mongo DB
A client based on Eclipse Paho ( https://www.eclipse.org/paho/ ) developed in Python might add persistence by writing to a Mongo DB datastore:
### Python MQTT client
### Subscribes to an MQTT topic receiving JSON format messages in format:
###    [{"ts":1586815920,"temp":22.3,"pressure":102583,"alt":76}]
###
### Writes receieved JSON data to a mongo DB collection
###
import paho.mqtt.client as mqtt
import json
import pymongo

mqtt_server = "192.168.1.127"
mqtt_port = 1883
mqtt_keepalive = 60
mqtt_channel_out = "esp8266.out"
mqtt_channel_in = "esp8266.in"

mongo_server = "mongodb://localhost:27017/"
mongo_db = "weather"
mongo_collection = "sensorData"

def on_connect(client,userdata,flags,rc):
    print("Connected with result code:"+str(rc))
    print ("MQTT server: "+mqtt_server+", port: "+str(mqtt_port));
    print ("MQTT topic: "+mqtt_channel_out);
    client.subscribe(mqtt_channel_out)

def on_message(client, userdata, msg):
    print(msg.payload)
    parsed_json = (json.loads(msg.payload))
    res = sensorData.insert_one(parsed_json[0])

mongoClient = pymongo.MongoClient(mongo_server)
mydb = mongoClient[mongo_db]
sensorData = mydb[mongo_collection]

mqttClient = mqtt.Client()
mqttClient.connect(mqtt_server,mqtt_port,mqtt_keepalive);

mqttClient.on_connect = on_connect
mqttClient.on_message = on_message

mqttClient.loop_forever()
Web Browser Client – D3.js WebSocket Real Time Chart
WebSockets are supported natively in JavaScript by modern browser clients.
Setting up a WebSocket client, we consider re-connect attempts and parse received message data (JSON format in this example):
<script type="text/javascript">
var dataArr = [];
var ws = null
var maxReconnectAttemps = 10;
var reconnectAttempts = 0;
// setup WebSocket
function setupWebSocket()
{
reconnectAttempts = 0;
ws = new WebSocket('ws://192.168.1.127:8080',[]);
ws.onopen = function () {
console.log('WebSocket Open');
};
ws.onerror = function (error) {
console.log('WebSocket Error ' + error);
};
ws.onmessage = function (e) {
var rawData = e.data;
if(rawData.trim().length > 1 && rawData.trim() != "undefined")
{
try {
var jsonObj = JSON.parse(rawData);
jsonObj[0]['t'] = jsonObj[0]['t']; // temperature
jsonObj[0]['p'] = jsonObj[0]['pressure']; // air pressure
jsonObj[0]['a'] = jsonObj[0]['alt']; // altitude
dataArr.push(jsonObj);
} catch(e) {
console.log("Invalid JSON:"+rawData.toString());
}
}
};
}
// check connection status every 60sec, upto maxReconnectAttemps, try reconnect
const interval = setInterval(function checkConnectStatus() {
if (reconnectAttempts++ < maxReconnectAttemps)
{
if (ws.readyState !== ws.OPEN) {
console.log("WS connection closed - try re-connect");
setupWebSocket();
}
}
}, 60000);
document.addEventListener("DOMContentLoaded", function() {
setupWebSocket();
});
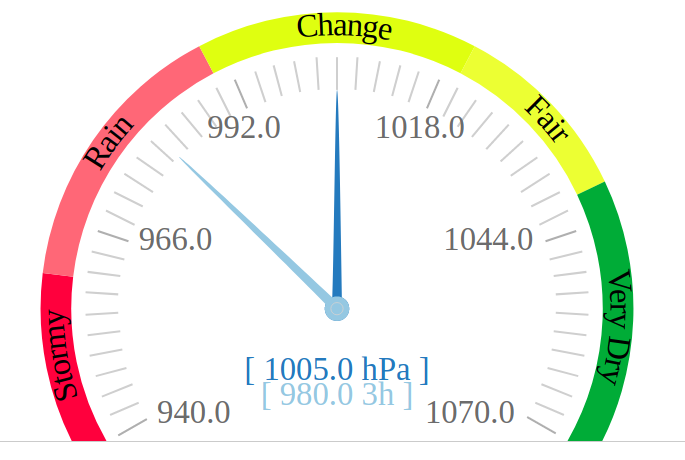
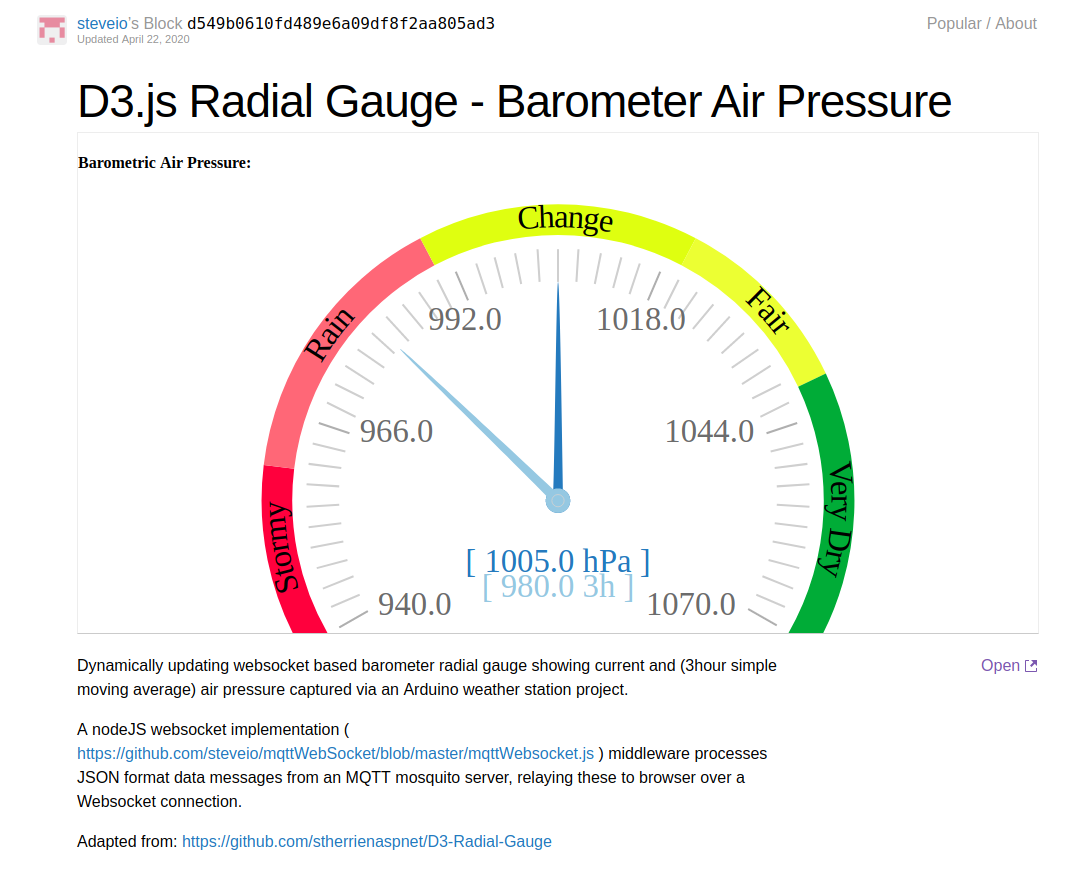
Finally D3.js ( https://d3js.org/ ) is used to render chart as HTML5 / SVG.

Source code and documentation can be found here:
Barometer D3.js:
http://bl.ocks.org/steveio/d549b0610fd489e6a09df8f2aa805ad3
https://gist.github.com/steveio/d549b0610fd489e6a09df8f2aa805ad3
ESP32 wifi Arduino MQTT sensor Client:
https://github.com/steveio/arduino/blob/master/ESP32SensorOLEDWifiMQTT/ESP32SensorOLEDWifiMQTT.ino
MQTT to WebSocket NodeJS relay:
https://github.com/steveio/mqttWebSocket