Binary wire protocols are long established for embedded machine to machine (M2M) communication, network applications and wireless radio data transmission.
Internet of Things (IOT) devices, real time sensors, robotics, smart home of industrial machine control data also demand efficient, low latency & lightweight data communications.
WebSockets ( RFC6455 ) protocol brings native support for binary framed messaging to web browser clients, offering a compact lightweight format for fast and efficient endpoint messaging.
Why use binary format data messaging?
Compared to serialisation of more complex text based wire formats, binary is lightweight and requires minimal storage / bandwidth and processing.
Taking an example key/value command data message:
// JSON encoding
{"cmd":101,"value":180}
23 * 2 = 46 bytes

// CSV plain text encoding
101,180\n
9 * 2 = 18 bytes

// Binary
101 180
int (4 bytes) + int(4 bytes)
4+4 = 8 bytes
In case of high performance applications supporting a large number of clients or very high frequency of data exchange, minimising data size, bandwidth and processing becomes an important priority.
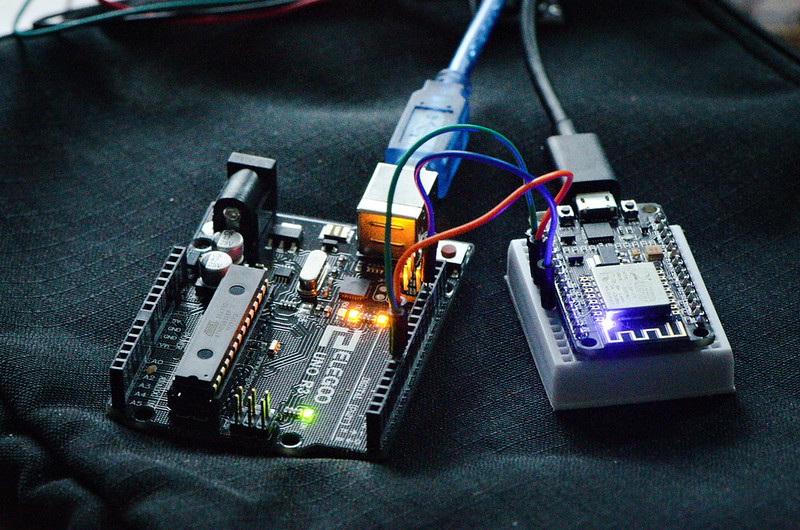
Taking as a simple example an embedded ESP8266 WiFi device, message gateway and web browser client, data serialisation and bidirectional binary framed WebSocket data exchange are demonstrated.
ESP8266 Byte Array Serialisation
Internally data is represented in embedded microcontrollers as ones and zeros, sequences of bits arranged in addressable memory.
Higher level programming language abstraction provides human readable textual labels and in case of C/C++ associated type information.
Lets define a mixed type data structure that could be some kind of sensor or message data payload –
    // define mixed type data struct
    struct Data
    {
        int id;
        float v1;
        float v2;
        unsigned long v3;
        char v4[20];
    };

    struct Data data;

    // populate data values
    data.id = 67;
    data.v1 = 3.14157;
    data.v2 = -7.123;

    unsigned long ts = millis();
    data.v3 = ts;

    char c[20] = "N NE E SE S SW W NW";
    strncpy(data.v4, c, 20);
To access underlying bytes, a pointer to data structure address is created –
    uint8_t * bytePtr = (uint8_t*) &data;
    webSocket.sendBIN(bytePtr, sizeof(data));
Data pointer and length are passed to WebSocket send method “webSocket.sendBIN()”, byte range is read, packaged (framed) according to protocol specification and written to TCP/IP network socket.
Hexidecimal and Binary text representation of in memory data structure can also be displayed –
void printBytes(const void *object, size_t size)
{
    const uint8_t * byte;
    for ( byte = (uint8_t *) object; size--; ++byte )
    {
        Serial.print(*byte, HEX);
        Serial.print("\t");
        Serial.println(*byte, BIN);
    }
    Serial.println('\n');
}
Python WebSocket Server

A Python3 middleware hosts WebSocket server and acts as a message relay gateway.
Binary WebSocket messages can be decoded in Python, the struct module performs conversions between Python data types and C structs –
async def wsApi(websocket, path):
    try:
        async for message in websocket:
            print('User-Agent: '+ websocket.request_headers['User-Agent'])
            print('Sec-WebSocket-Key: '+websocket.request_headers['Sec-WebSocket-Key'])
            print('MessageType: '+str(type(message)))
            print(message);
            print('Hex: '+message.hex());

            if isinstance(message, (bytes, bytearray)):

                i = message[:4];
                print(i);
                tuple_of_data = struct.unpack("i", i)
                print(tuple_of_data)

                tuple_of_data = struct.unpack_from("f", message, 4)
                print(tuple_of_data)

                tuple_of_data = struct.unpack_from("f", message, 8)
                print(tuple_of_data)

                tuple_of_data = struct.unpack_from("i", message, 12)
                print(tuple_of_data)

                tuple_of_data = struct.unpack_from("20s", message, 16)
                print(tuple_of_data[0])

                ## forward message
                await asyncio.wait([user.send(message) for user in USERS])
To index into byte array and read a number of bytes according to data type being unpacked Python’s array slice method “i = message[:4]” can be used where [<from>:<to>] specifies start/end positions.
Method struct.unpack_from() is another approach, taking as parameters a format character specifying data type (“i” – integer, “f” – float), data buffer and an index (in bytes) to read from.
Here is decoded binary message output including some WebSocket headers –
User-Agent: arduino-WebSocket-Client
Sec-WebSocket-Key: zoJ0aR/5XunSvEKKcUkWfQ==
MessageType: <class 'bytes'>
b'C\x00\x00\x00|\x0fI@\x9e\xef\xe3\xc0\xb9\x17\x00\x00N NE E SE S SW W NW\x00'
Hex: 430000007c0f49409eefe3c0b91700004e204e45204520534520532053572057204e5700
b'C\x00\x00\x00'
(67,)
(3.1415700912475586,)
(-7.123000144958496,)
(6073,)
b'N NE E SE S SW W NW\x00'
Web Browser – Binary Encode/Decode in JavaScript
In web browser, JavaScript primitives Blob, ArrayBuffer and TypedArray perform a similar conversion.
Firstly, received WebSocket messages (event object) can be debugged to console –
 websocket.onmessage = function (event) {
    console.log(event);
Binary framed data payload is reported as type “Blob” (raw data) of length 36 bytes –

To de-serialise message, raw data Blob is converted asynchronously using FileReader API to ArrayBuffer, a generic fixed length binary data buffer –
    if (event.data instanceof Blob)  // Binary Frame
    {
      // convert Blob to ArrayBuffer
      var arrayPromise = new Promise(function(resolve) {
          var reader = new FileReader();

          reader.onloadend = function() {
              resolve(reader.result);
          };

          reader.readAsArrayBuffer(event.data);
      });
When promise is fulfilled, ArrayBuffer can be read using typed views (Uint32Array, Uint32Array) for integer (including long) and float types, TextDecoder API is used to decode character array –
arrayPromise.then(function(buffer) {

          // Decoding Binary Packed Data

          // int (4 bytes)
          var arrInt = new Uint32Array(buffer);
          var id = arrInt[0];
          console.log("id:"+id);

          // 2x float (4 bytes)
          var arrFloat = new Uint32Array(buffer,4);
          var v1 = arrFloat[0];
          var v2 = arrFloat[1];
          console.log("v1: "+v1);
          console.log("v2: "+v2);

          // long (4 bytes)
          var v3 = arrInt[3];
          console.log("v3:"+v3);

          // character data (20 bytes)
          var uint8Array = new Uint8Array(buffer,16);
          var string = new TextDecoder("utf-8").decode(uint8Array);
          console.log(string);
      });
JavaScript Binary Data Encoding
Binary data can also be encoded from native JavaScript. TypedArrays created for each data type – integer, float, long and character array are populated and packed into an ArrayBuffer suitable for use as WebSocket data payload –
console.log("Binary Encode example");

// Binary Encode example
var buffer = new ArrayBuffer(36)
var arrInt =   new Uint32Array(buffer, 0, 1);
arrInt[0] = 67;
var arrFloat = new Float32Array(buffer, 4, 2);
arrFloat[0] = 3.14157;
arrFloat[1] = -7.123;

var arrInt2 =   new Uint32Array(buffer, 12, 1);
arrInt2[0] = Date.now();

var uint8Array = new Uint8Array(buffer,16);
var charBuffer = new TextEncoder("utf-8").encode("N NE E SE S SW W NW");

for(var i = 0; i<charBuffer.length; i++)
{
  uint8Array[i] = charBuffer[i];
}

// send binary data
websocket.send(buffer);
At message gateway, logs demonstrate parity between data packed by embedded device and those sent from web browser client –
User-Agent: Mozilla/5.0 (X11; Linux x86_64) AppleWebKit/537.36 (KHTML, like Gecko) Chrome/69.0.3497.100 Safari/537.36
Sec-WebSocket-Key: 1TD9Zp71cMTivUbj+QSx5w==
MessageType: <class 'bytes'>
b'C\x00\x00\x00|\x0fI@\x9e\xef\xe3\xc0\x07\x1c\xff\x91N NE E SE S SW W NW\x00'
Hex: 430000007c0f49409eefe3c0071cff914e204e45204520534520532053572057204e5700
b'C\x00\x00\x00'
(67,)
(3.1415700912475586,)
(-7.123000144958496,)
(-1845552121,)
b'N NE E SE S SW W NW\x00'
Limitations / Drawbacks
Compared to UTF-8 text formats (XML, JSON) packed binary data has significant disadvantages –
- legibility – text based key/value formats are easy to read, manipulate and maintain
- fixed frame boundaries – using positional byte sequence indexes means even small changes to message structure, size or field position require updates to consumer client code
- endianess / alignment / padding must be maintained consistently, compiler and platform implementation differences may occur
Security
WebSockets Secure (WSS) offers transport layer security (TLS) to encrypt data streams. An authentication and authorisation strategy (challenge/response password, token or certificate based) for client identification should also be deployed. Cryptographic message digest signing or encryption might also be used as extra protection for critical data.
